Customizing the Quit Confirmation Screen in Ren'py & Creating a Class Within a Class
Hello, hello!
This is my first devlog for To The Beat Of A Heart, so I figured I would just write a (not so)simple tutorial for how I customized the quit confirm menu to modify the text and add an image. And also, how to create instances of a class within another class. The purpose of this is so that others can learn and discuss, and also, I'm very forgetful and get mentally fatigued quite easily, so I can just refer to my own notes here if I forget how to do this in the future! We love to copy pasta previous code!
It's actually quite easy to do the two modifications for the quit confirm screen, but I did struggle a little bit to implement them for a few different reasons; the info I needed to do it was in bits and pieces around the web that I had to gather and make work together, and also, I wanted my image to change based on the current love interest that the player is interacting with(which was kinda a nightmare for my current python knowledge)!
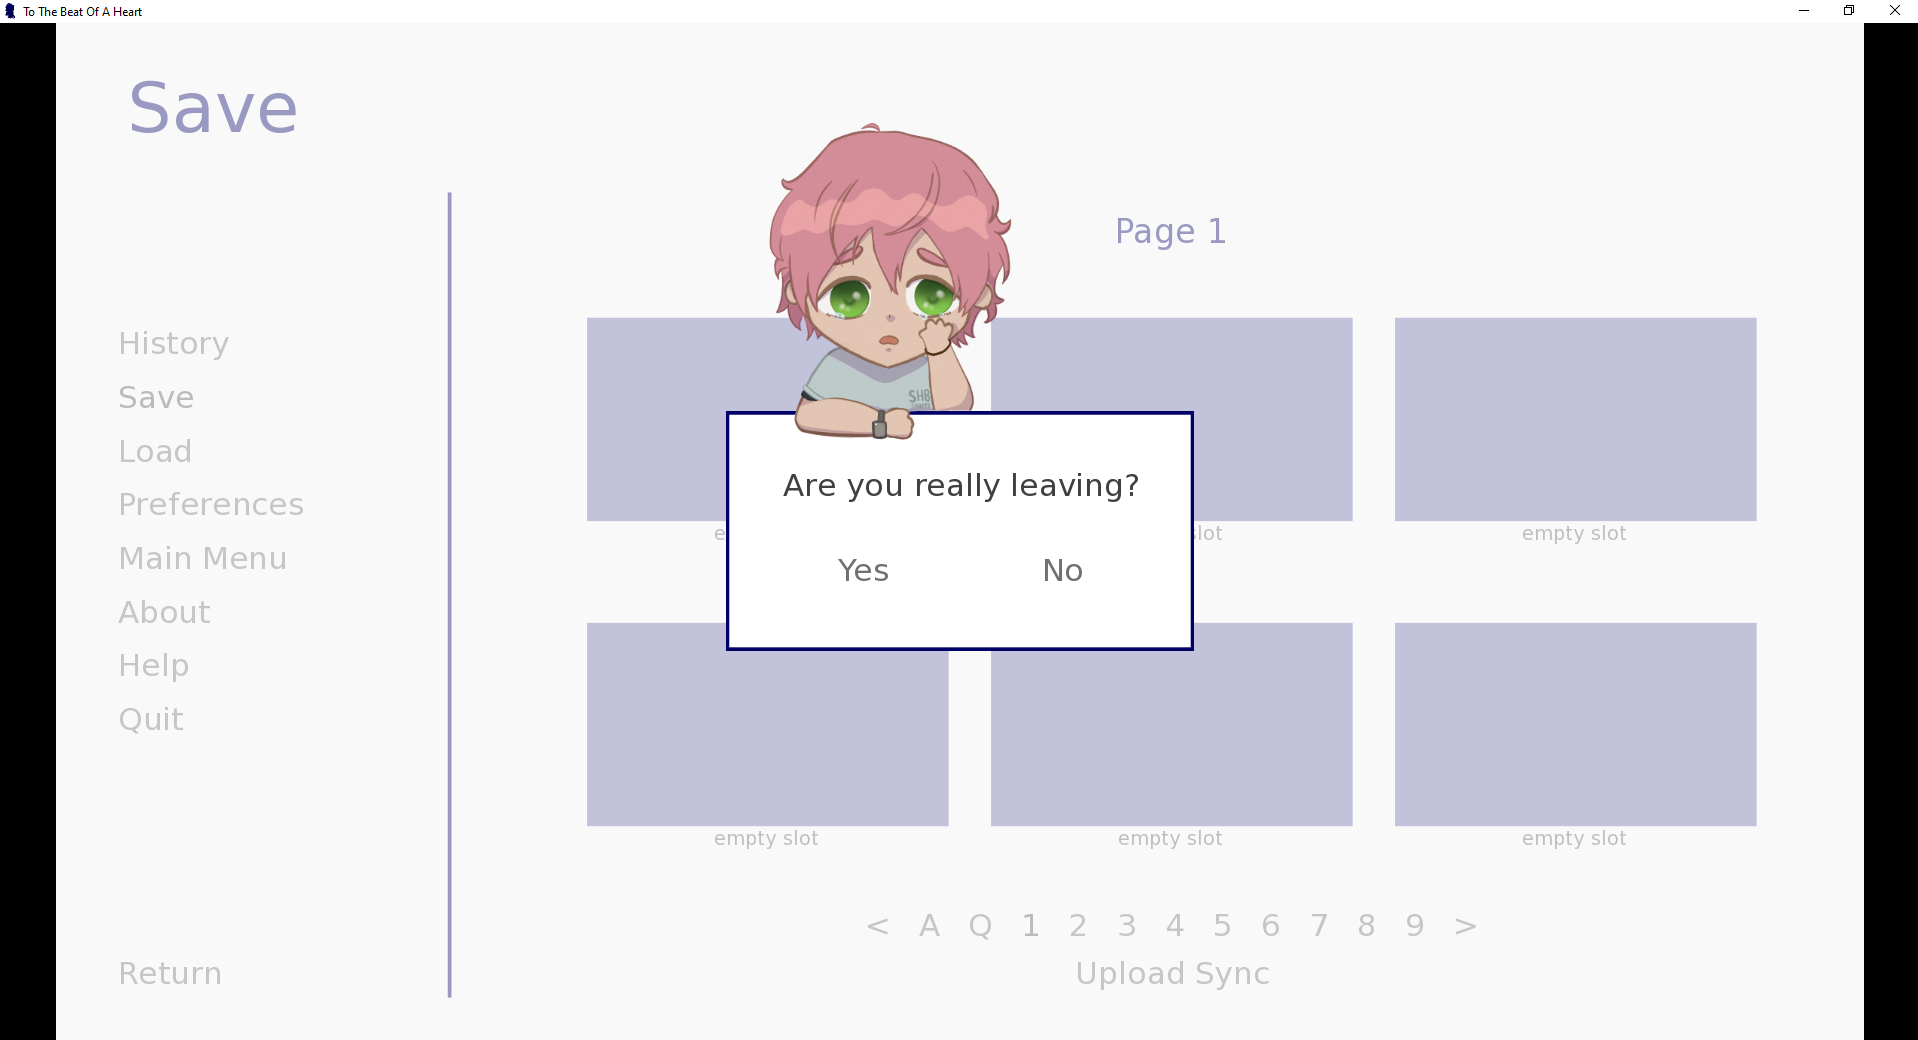
Here's what mine looks like at the current stage (I've done no other gui customization yet, hehe)
So this tutorial will be broken down into 3 pieces:
1. Modifying the quit confirm screen text (easy)
2. Adding an image to the quit confirm screen (easy)
3. Making the image dynamic (i dont even know how i managed to do this successfully tbh, but don't worry there is an easy way that I didn't end up using, hehe)
Modifying the text
To modify the text, first locate the translation file that you'll be modifying. If you don't currently have any translations, the file you're looking for is `game/tl/None/common.rpym`. If you have multiple translations, then `None` will be replaced with the respective language. For example, `game/tl/English/common.rpym`.
Next, find this comment, you can use Ctrl+F or, mine was on line 468.
# renpy/common/00gui.rpy:450
Now, you'll see a line of text that is labeled as 'old' and another labeled 'new'. Change the text for 'new' to whatever you want the screen to read. The line labeled 'old' is used to cross reference the screen code for the confirm screen, so make sure to leave it as is.
As an example, I wanted my text to make it seem like the love interest was pleading for you not to go, so I changed my 'new' text to read "Are you really leaving?"
Make sure you save and test your game to make sure you haven't made any mistakes!
Adding an image
Next, open screens.rpy and find the confirm screen. You can use Ctrl+ F to find `screen confirm` or, mine was on line 1141.
This screen is used for aaaaallll the yes/no confirm screens in the game, so first, we need to specify that our image should only appear when the player is quitting the game. To do this, we will create an if statement to show the image. Where the statement goes though, depends on how you want the image to be layered in regards to the other images on the screen.
Screens stack images in the order they are added, with the first being the furthest back, and the last being the closest to the player.
If you want your image to be at the very back, behind the confirm box and also the dimmed screen, place your statement before the line containing :
add "gui/overlay/confirm.png"
If you want your image to appear behind the confirm box but in front of the dimmed screen, place your statement after the line containing:
add "gui/overlay/confirm.png"
If you want your image to appear in front of both the confirm box and the dimmed screen, place your statement before
## Right-click and escape answer "no".
Making sure that your indenting correctly lines up so that it is outside of the confirm prompt frame.
For the actual statement, we want an if statement that checks if the screen is the quit screen. We do that by adding this line:
if message == gui.QUIT:
Next just add the image in like so:
add "imagename.png"
changing the 'imagename' to whatever the name of your image is . If your image is nested in a folder within the overarching 'images' folder, you'll need to add the path, like so:
add "foldername/imagename.png"
Make sure that your indenting lines up correctly to be a child of the if statement, and that you've typed the image path out correctly.
If you'd like, you can add a transform to the image to move it into place on the screen. It will take the usual screen transforms, but as an example, I used:
add "foldername/imagename.png" align 0.45 yalign 0.11 zoom 0.4
- to make my image smaller and place it so that it's sort of hanging over the top left of the confirm frame.
If your image will be static and always be the same, then you're all done! Congrats!
Making a dynamic image
Now, if you'd like to make the image change based on certain factors, there's a bit more work to do. The main difficulty here is that I've used python to update the information in the screen based on the players game state. I'll try to provide both a basic renpy and a python integration to satisfy both use cases but if you'd like to use the python version and you've not used it before, it might be a bit tricky for you, and I recommend you do some research on python classes and renpy screen language before trying this next part!
Good? Okay, let's continue!
The Ren'Py Way
If you just want to make the path dynamic by passing in a variable, all you need to do is create a variable that you can update at any time.
First define your variable in Ren'py, I put mine in script.rpy, but you can put it wherever makes sense.
define customImage = "image1"
Then in the quit confirm screen, swap your new variable in where we previously put `imagename`, like so:
add "foldername/[customImage].png"
Then you can just change the variable whenever you want in your Ren'Py code, like this:
$ customImage = "image2"
And that's it, easy right? You can add this to if statements, or randomize it, depending on your use case, and it'll pass in the variable and so long as there is a valid image name that matches the variable, it should work!
Moving on to bigger fish!
The Python Way
I'm sure this isn't the most ideal way to do this, but I'll just show what I did to make mine work. To start, let me explain how my game plays so you can see why I did it this way. So my game works by having multiple love interests and the player essentially selectes one 'route' or 'branch' to play at a time, they complete that run and then are returned to the beginning where they can replay the same route or select a different one with a different love interest. For this reason, the player will typically be within a route, but it's possible that's not always the case. In my version of the quit confirm screen, I show a little chibi version of the currently selected love interest, and if the player is outside of a route, ie. no love interest is active, then it chooses a love interest at random from a list of the ones that the player has unlocked thus far. Ie. Only a love interest whose route is playable can be seen on the quit confirm screen. I'm sure that you can use dynamic images here to show different things, such as different expressions, or outfits, but this is just how I did it, so I'll use that as an example.
First, I created a new python class, which would hold the information about all the routes that are available to play. For it's arguments, I added the currently selected route and then a list of unlocked/playable routes, which will be added to whenever a new one is unlocked. My code looks like this:
init python:
    import random
    class allroutes(object):
         def __init__(self, name):
            self.currentroute = "none"
            self.unlocked = []
You can add other things within this class, but I'll keep it to just this for now. Note that I imported random in order to randomly select one of the unlocked love interests if they're currently outside of a route. If you won't be adding any randomization, you can skip that line.
Next, I created an inner class (shown here as 'route') within the outer class ('allroutes'):
    class route(object):
        def __init__(self):
            self.name = "none"
This works so that the 'route' class is created within the 'allroutes' class and thus, is contained within it. I find that this is a clean way to reuse my code and keep it manageable. Make sure that this is indented properly so that its contained within the previous class.
Then, create a couple instances of the 'route' class within the 'allroutes' class. You can just add this to the list from before, underneath 'self.unlocked'.
        self.shawnRoute = self.route("Shawn")
        self.taiRoute = self.route("Tai")
And obviously, change 'Shawn' and 'Tai' to whatever the name of your love interest is if you use this bit of code, or change the names to better suit your needs. Make sure that this is after any python but before your ren'py labels. Again, check your indenting so that it's not contained within the inner class, but the outer class.
To make all of this usable, we'll need to make an instance of this class for the quit confirm screen to reference. I added mine at the top of my script.rpy, under the routes we created earlier like so:
define allRoutes = allroutes("none")
You can use whatever your want to name the variable, but the class should match the one you created earlier. I use capitalization to differentiate between the class and the instance, but you can do whatever works for you. Also make sure that if you've set up the class property to check for "none" that you add that as the default value. And again, make sure this is place below any python code, but above your labels. It has to go below the routes you created before or else you'll get an error when trying to reference the routes within this class.
And also, make sure that you update 'currentRoute' when selecting and/or deselecting the routes, so that the right route is being displayed. In renpy language, that will look like this:
$ allRoutes.currentroute = allRoutes.shawnRoute
$ allRoutes.currentroute = "none"
To add a new route to the unlock list at any point in the game, you'll just need to append the list we defined earlier in the allRoutes instance. Place this anywhere in your Ren'Py code where the player will unlock a new route. Since we made the list empty when we created it, I make sure to immediately append the list so that at least one route is available.
$ allRoutes.unlocked.append(allRoutes.taiRoute)
And just change 'tai' to whatever your other character is named, or whatever other instance/variable you want to put in here.
Next, head back to your python block and let's add to the allroutes class we made. I added 2 properties, the first to decide which image will be displayed, and the second to return the file path for the selected image.
    @property
     def quitChibi(self):
         if allRoutes.currentroute == "none":
             return random.choice(allRoutes.unlocked)
         else:
             return self.currentroute
    @property
     def quitChibiImage(self):
         return self.quitChibi.name + "/" + self.quitChibi.name + ".png"
In `quitChibi`, I check if a route is currently selected, by comparing the value of the allRoutes instance's `currentroute` property with the string, "none". If no route is currently selected, then the property will return one of the items contained in the allRoutes.unlocked list, selected randomly. If a route is currently active, it will instead return the instance of the selected route.
In `quitChibiImage`, I take the file path from earlier in the quit confirm screen, but instead I add in the property `quitChibi` that we determined just before. In order to make the file path readable, we use a combination of the property and strings, and then concatenate them together. In this example, the file path is the name of the selected love interest, which is in a folder that holds all the images for that character, and then grabs the image that has the name matching `currentroute.name` or the `.name` of the randomly selected route, and is a png file. Did that make sense? I hope so, haha...
Now the file path is customized, but the quit confirm screen won't use it yet. Finally, save your work and head back to the confirm screen code we modified in the screens.rpy file. Then just replace the file path from earlier with allBranches.quitChibiImage so that it passes in our dynamic file path. It should look something like this:
if message == gui.QUIT:
    add "[allBranches.quitChibiImage]" xalign 0.45 yalign 0.11 zoom 0.4
Anywho, that's the main idea. If you want to change the gui background or the text styling, this can be done by swapping out `"gui/overlay/confirm.png"` and by modifying the `confirm_prompt` style in screens.rpy.
Let me know if you learned something new or found this log interesting in the comments below. And if there's anything that you would change in your own implementation, let me know that as well! Otherwise, thank you for reading and I hope you'll look forward to my new game!
Have a lovely day & remember to be kind!
Moo 🐄
Leave a comment
Log in with itch.io to leave a comment.